Welcome to this tutorial on how to manage Email Accounts in cPanel, including creating new email account, changing email password or disk space, deleting email account or finding the details of email client software configuration.
We assume that you have already logged into cPanel.
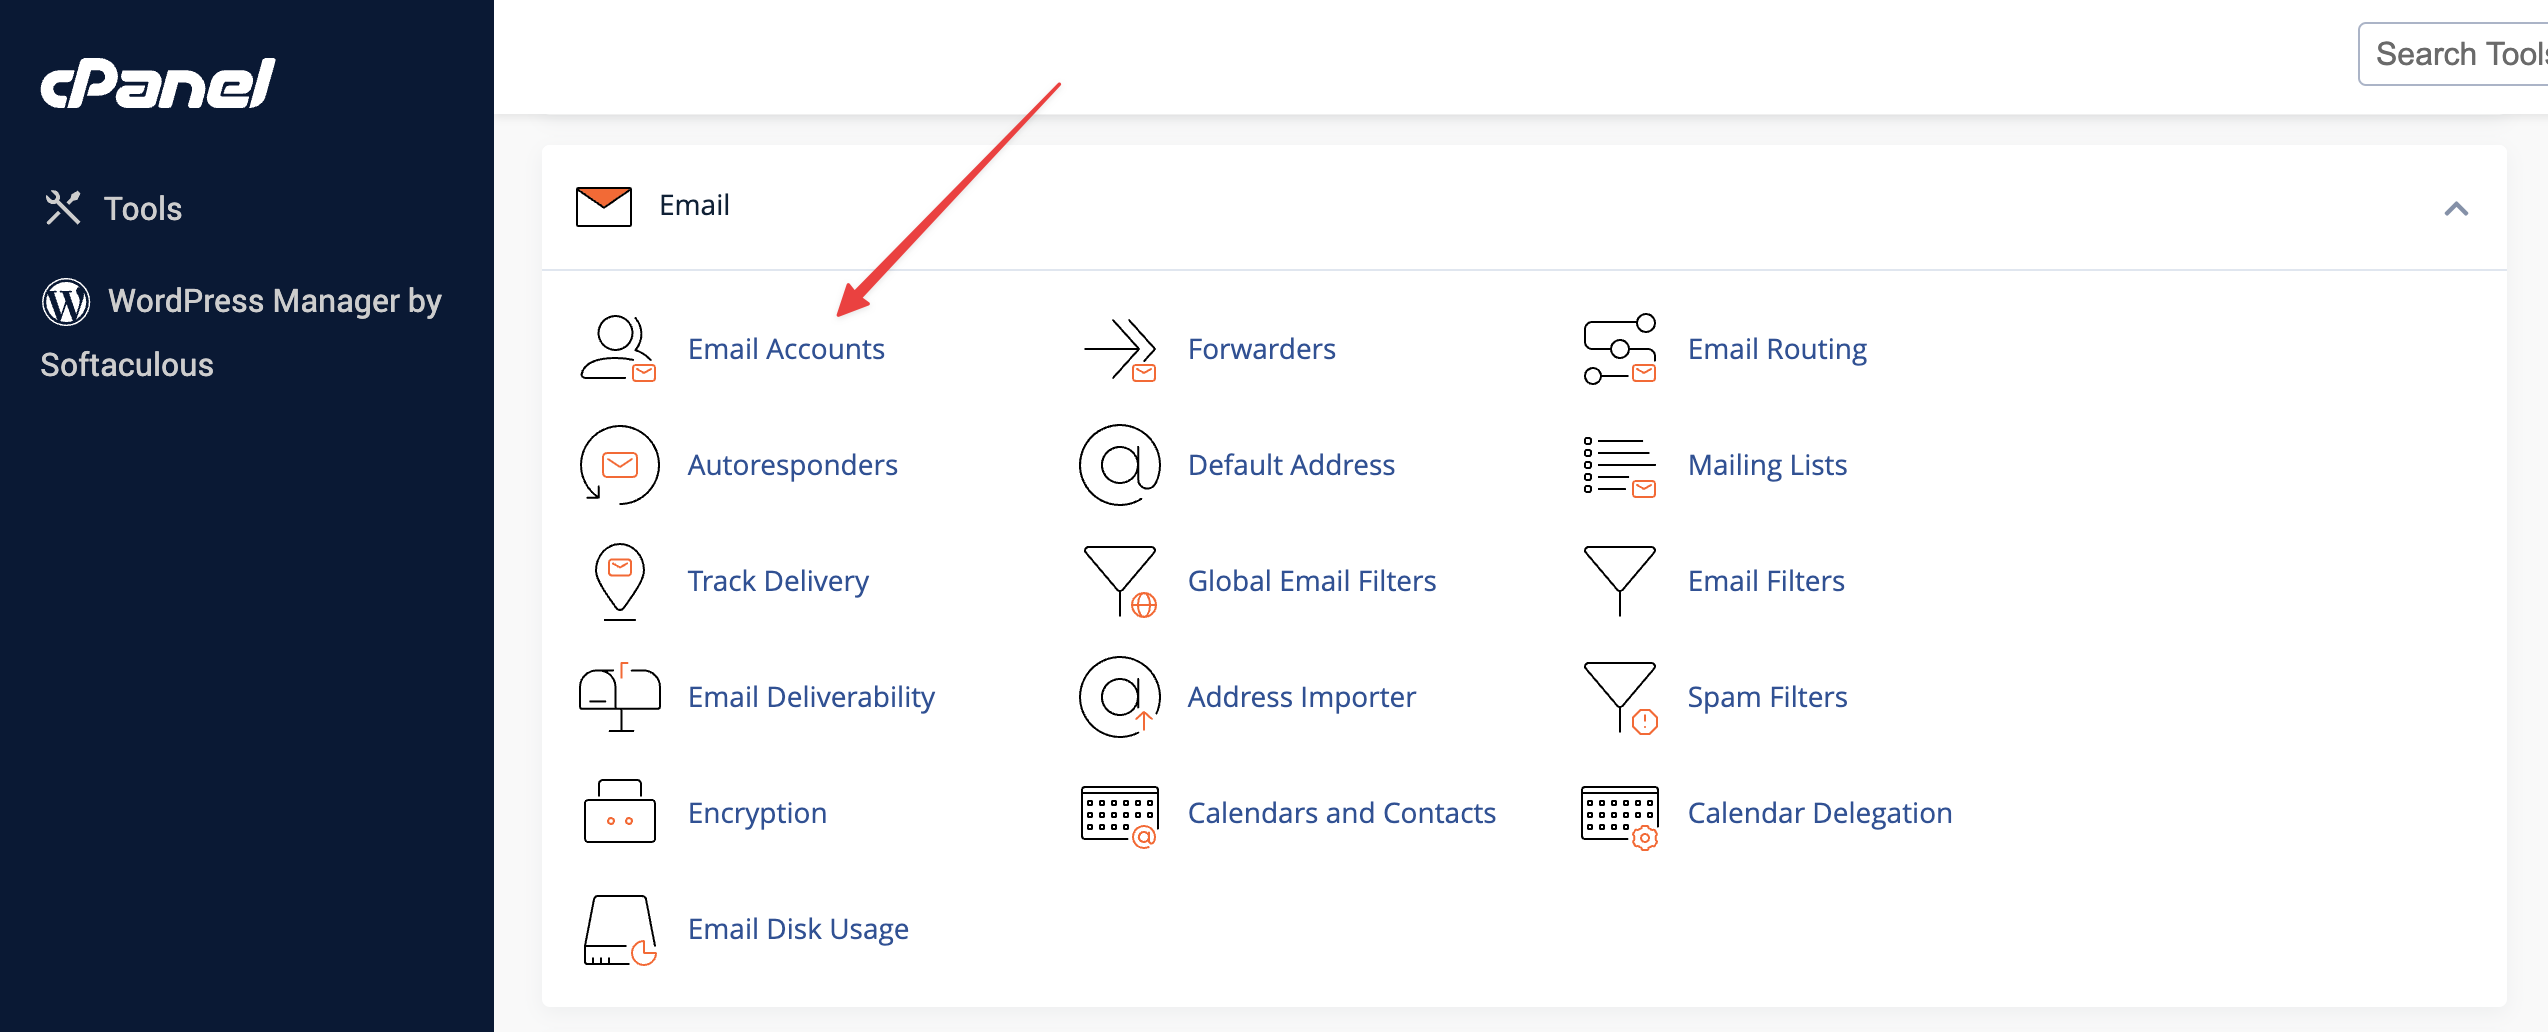
Click Email Accounts icon under the Email section.
You can also see all email accounts that you have created earlier and can manage them e.g. change password, change disk space for email account, delete an email account, get the details of email configuration to setup in Outlook, Thunderbird or other email software on your computer.
The list of email accounts also shows how much disk space is used by each account.
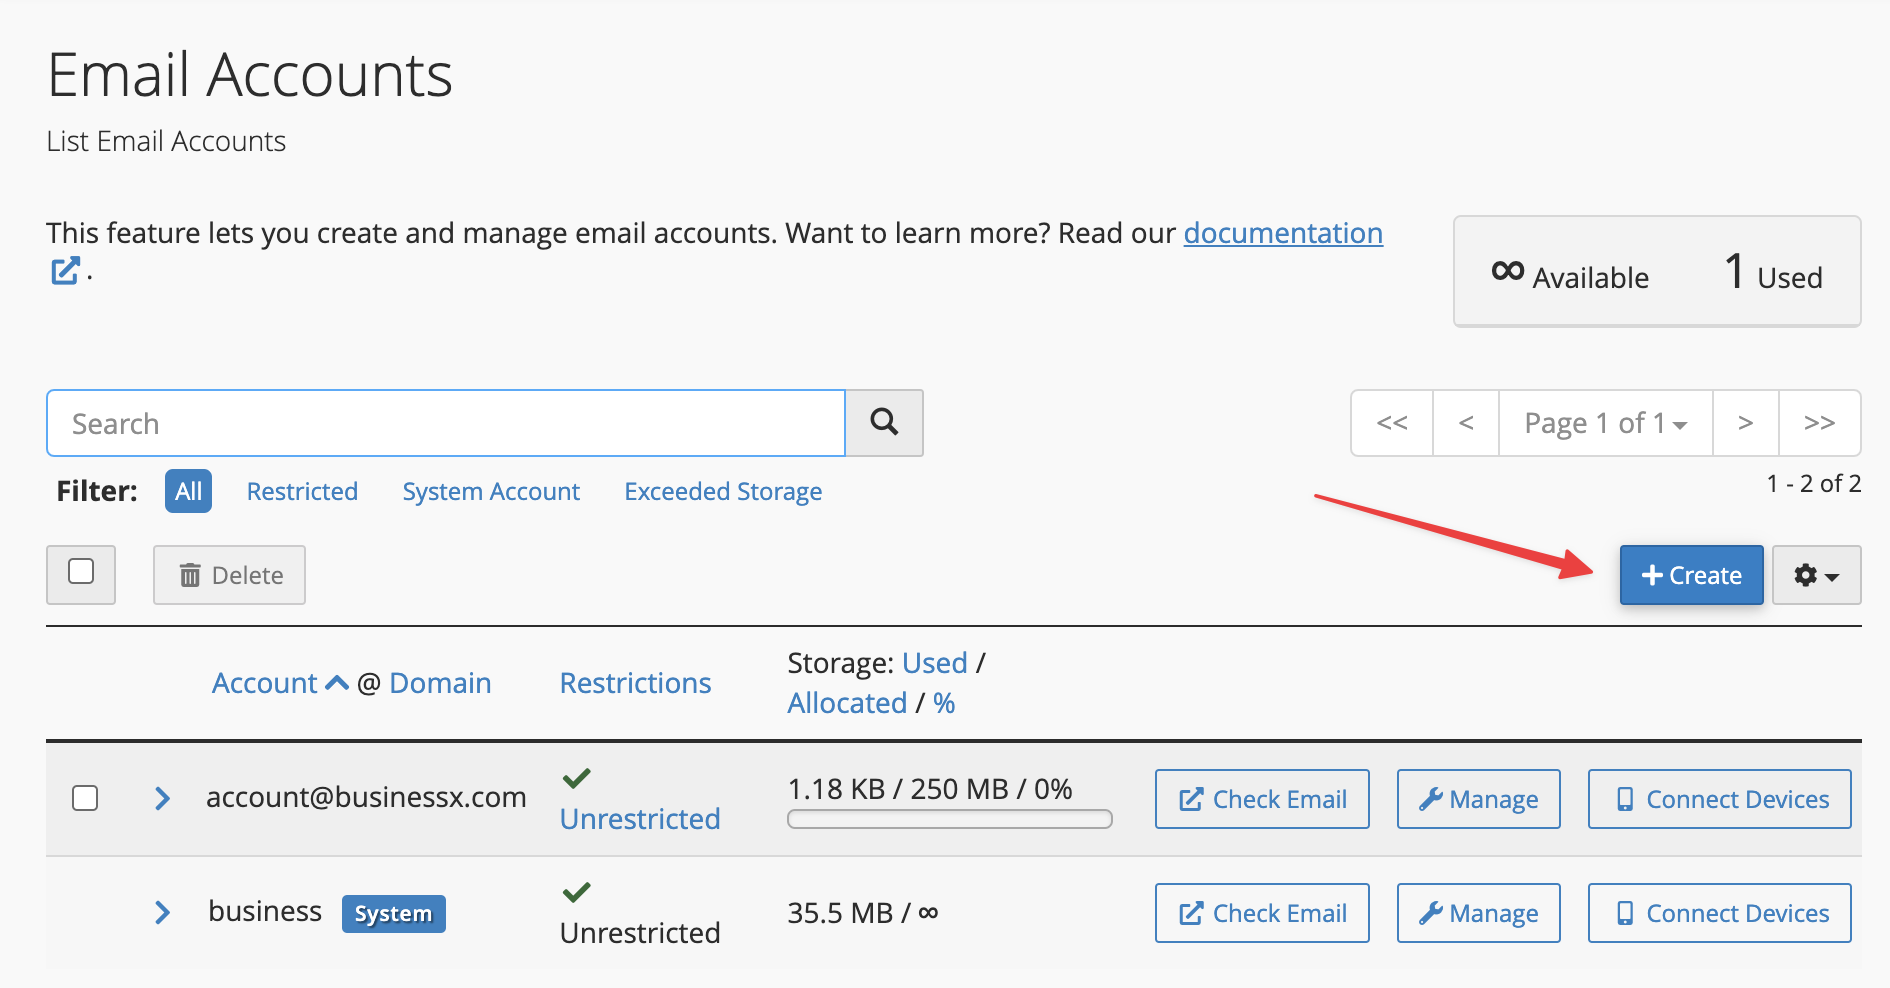
To create a new email account, click Create button to go to the next screen.
You can create your required email address on this Email Accounts screen for any of the domains you have in your account including addon and parked domains.
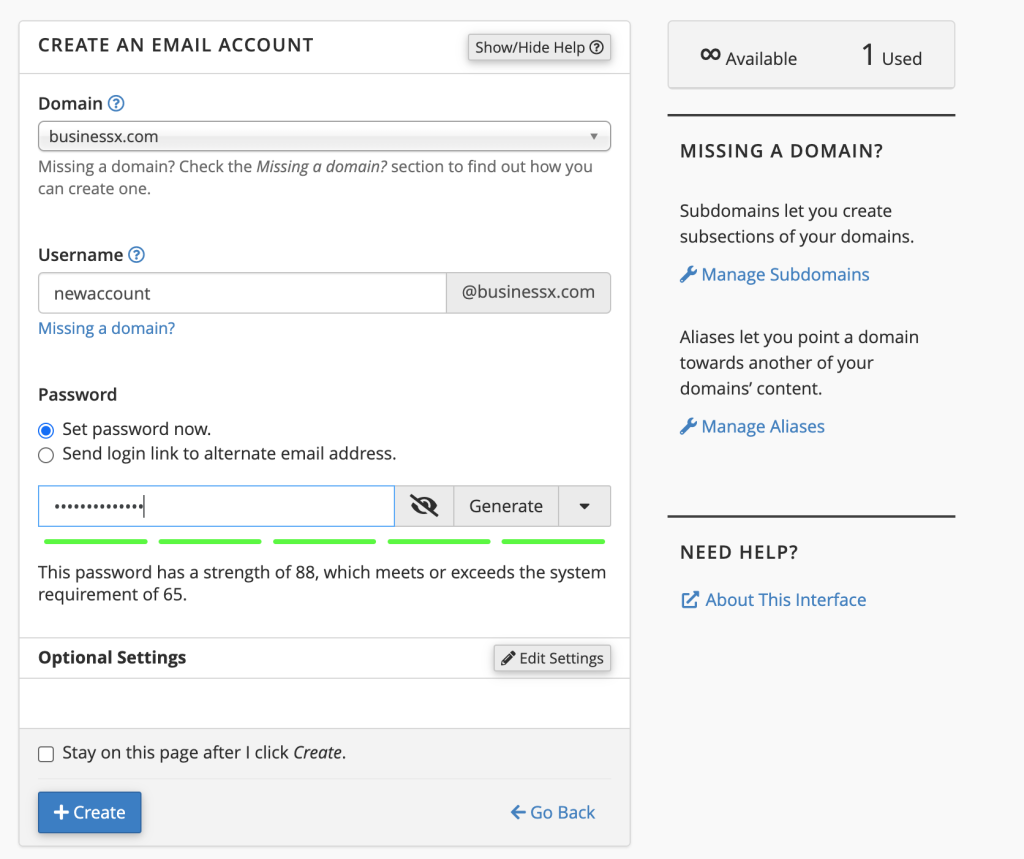
We are going to create a new account so we’ll focus on that part of the screen. Enter your desired email user. For this tutorial we use newaccount@businessx.com as the email address. Next enter a strong password. The strength indicator will show you how strong is your password. Try to use alpha-numeric, upper-lower case combination with a few special characters. Never use dictionary words or your name etc. You can click on Generate button to help you generate a strong password. Remember the password or note it down safely where only you can access it.
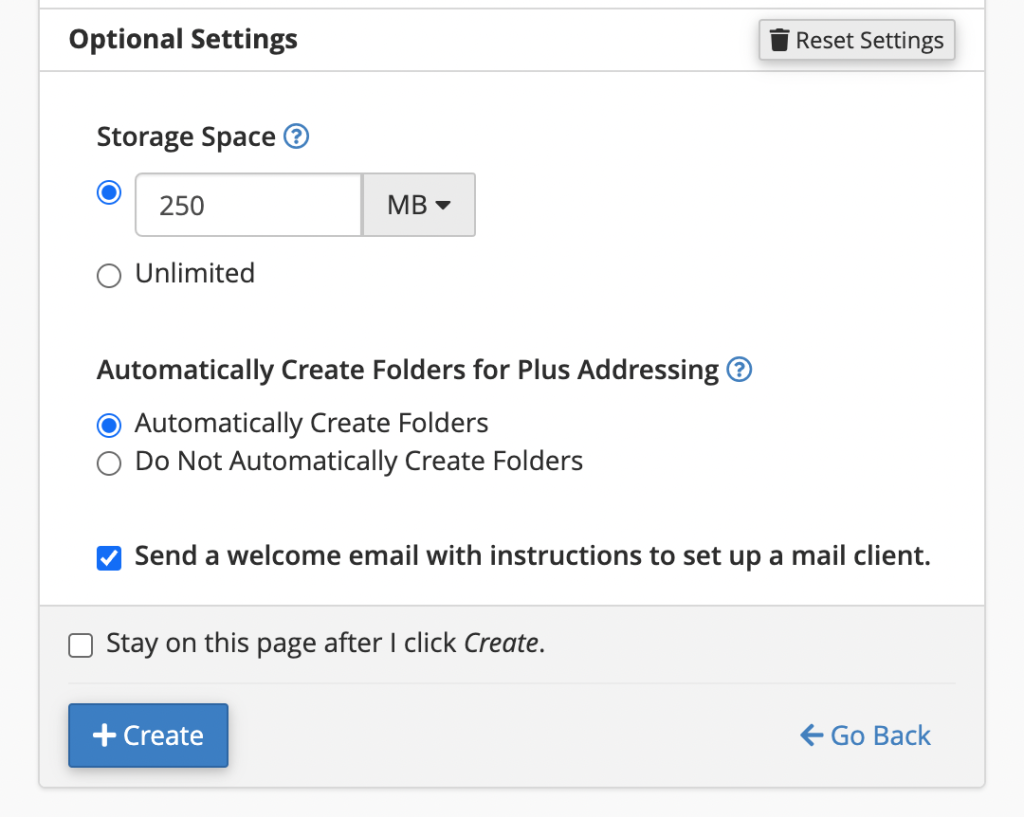
Click on the Optional Settings to set the mailbox quota. This is for the storage of emails for this particular email account in your hosting account. Please note that if this email account uses all the disk space you define here and is full, any new email will be rejected by the server with Mailbox quota exceeded error and returned to the sender of the email.
Click Create to finally create the email account.

Now that the email account has been created, it will be listed on this same page. If you have already forgotten the password 😉 you can change it by clicking Manage. Similarly you can change the disk quota or delete the account altogether and start over again.
Click Check Email to access Webmail which will take you to webmail. Click Connect Devices to view the page that provides manual and auto-configuration for a number of email clients such as Microsoft Outlook, Mac Mail, Postbox, Thunderbird and KDE Kmail.
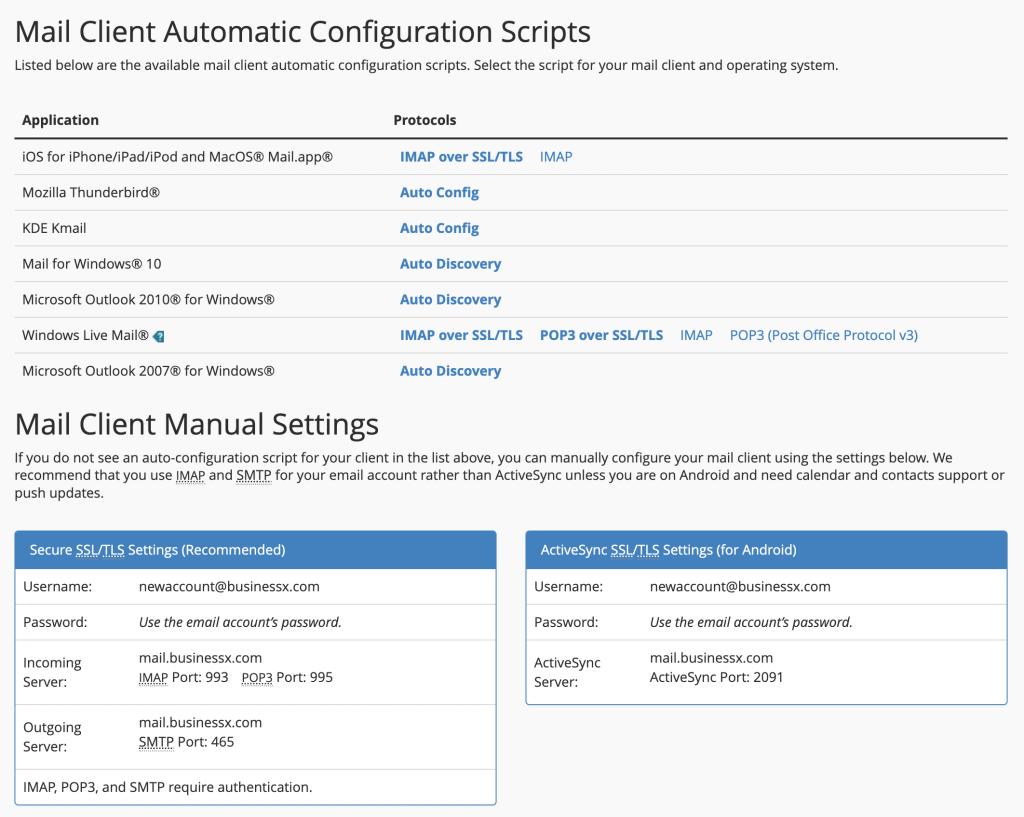
If Auto Configuration does not work for some reason, note down the manual settings on the screen.
Please make sure to use Secure SSL/TLS Settings (that is why they appear recommended). Also make sure to setup authentication for SMTP to send emails from the server.